


Excel Multiple Worksheets Report
In this post I will show the code added in a Report to use the multiple Excel Worksheets in Dynamics NAV 2013, in Part One I looked the changes to the Excel Buffer, and in Part Three I will add functions for formatting and to create real formulas.
The Report 50004 Export Items by Inventory Posting Group to Excel uses one of the functions in table 370 Excel Buffer I created in Part One, this solution will work with a minimal amount of changes in the code, no addition fields are required, the Table and Reports are in the download at the end of this post for Dynamics NAV 2013 R2.
The Solution
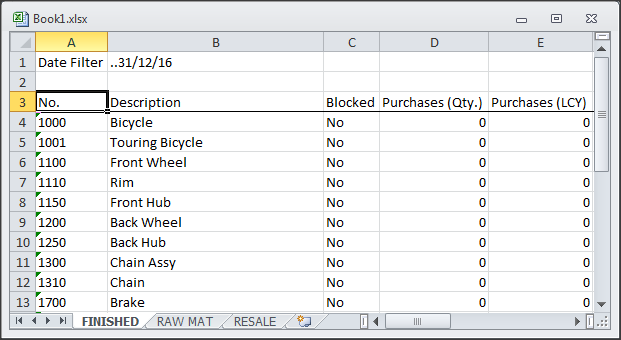
The way the report works is quite simple, it creates a new Worksheet of Items linked to each Inventory Posting Group, the Worksheet Name is stored in the Excel Buffer table with a Column No. of Zero, this tells the code in the Excel Buffer to add a new Worksheet.
I am not going to look at all the code in the report as some functions can be found in the Standard Reports that use Excel, I will look at the code in the Functions I have added in the Report.
Export Items by IPG – Report 50004
C/AL Globals
- Function: Name = AddSheet, Local = NewSheetName text 250
- Function: Name = AddHeader
- Function: Name = AddColumnHeaders
Function AddSheet
In the sample report the AddSheet function is called in the Item – OnPreDataItem trigger with the Inventory posting Group Code, AddSheet(IPG.Code);
In this function code I insert the NewSheetName into the Excel Buffer with a Column No. of Zero, if this is the first Worksheet where the RowNo is Zero, I assign the SheetName variable using the new Excel Buffer function ValidateSheetName, I then call the function AddHeader this adds the section with the Filters only on the first WorkSheet.
I then call the function AddColumnHeaders which adds the Column Headers to every Worksheet, putting the code into a function makes it easy to change if required.
//Add the Newsheet to the Excel Buffer
EnterCell(RowNo + 1,0,NewSheetName,FALSE,FALSE,FALSE,'',TempExcelBuffer."Cell Type"::Text);

//First Worksheet Only
IF RowNo = 0 THEN BEGIN
  SheetName := TempExcelBuffer.ValidateSheetName(NewSheetName);
  AddHeader;
END;

//Add the Worksheet Column Header Row
AddColumnHeaders;
//End
Function AddHeader
In this function code on the first Worksheet I insert the report filters, I have three filters, Inventory Posting Group, Location Code and Date Filter.
//Sheet One Filter Fields or Header
RowNo := 0;
IF IPG.GETFILTER(Code) <> '' THEN BEGIN
  RowNo := RowNo + 1;
  EnterFilterInCell(RowNo,
    IPG.GETFILTER(Code),
    Item.FIELDCAPTION("Inventory Posting Group"),
    '',
    TempExcelBuffer."Cell Type"::Text
  );
END;

IF Item.GETFILTER("Location Filter") <> '' THEN BEGIN
  RowNo := RowNo + 1;
  EnterFilterInCell(RowNo,
    Item.GETFILTER("Location Filter"),
    Item.FIELDCAPTION("Location Filter"),
    '',
    TempExcelBuffer."Cell Type"::Text
  );
END;

IF Item.GETFILTER("Date Filter") <> '' THEN BEGIN
  RowNo := RowNo + 1;
  EnterFilterInCell(RowNo,
    Item.GETFILTER("Date Filter"),
    Item.FIELDCAPTION("Date Filter"),
    '',
    TempExcelBuffer."Cell Type"::Text
  );
END;

IF RowNo > 0 THEN
  RowNo := RowNo + 1;
Function AddColumnHeaders
In this function code on all Worksheets I insert the Column Header Row, again I put the code in a function to make it easy to call and change for multiple worksheets.
RowNo := RowNo + 1;
WITH Item DO BEGIN
  EnterCell(RowNo,1,FIELDCAPTION("No."),FALSE,FALSE,TRUE,'@',TempExcelBuffer."Cell Type"::Text);
  EnterCell(RowNo,2,FIELDCAPTION(Description),FALSE,FALSE,TRUE,'@',TempExcelBuffer."Cell Type"::Text);
  EnterCell(RowNo,3,FIELDCAPTION(Blocked),FALSE,FALSE,TRUE,'@',TempExcelBuffer."Cell Type"::Text);
  EnterCell(RowNo,4,FIELDCAPTION("Purchases (Qty.)"),FALSE,FALSE,TRUE,'',TempExcelBuffer."Cell Type"::Text);
  EnterCell(RowNo,5,FIELDCAPTION("Purchases (LCY)"),FALSE,FALSE,TRUE,'',TempExcelBuffer."Cell Type"::Text);
  EnterCell(RowNo,6,FIELDCAPTION("Positive Adjmt. (Qty.)"),FALSE,FALSE,TRUE,'',TempExcelBuffer."Cell Type"::Text);
  EnterCell(RowNo,7,FIELDCAPTION("Positive Adjmt. (LCY)"),FALSE,FALSE,TRUE,'',TempExcelBuffer."Cell Type"::Text);
  EnterCell(RowNo,8,FIELDCAPTION("Negative Adjmt. (Qty.)"),FALSE,FALSE,TRUE,'',TempExcelBuffer."Cell Type"::Text);
  EnterCell(RowNo,9,FIELDCAPTION("Negative Adjmt. (LCY)"),FALSE,FALSE,TRUE,'',TempExcelBuffer."Cell Type"::Text);
  EnterCell(RowNo,10,FIELDCAPTION("Sales (Qty.)"),FALSE,FALSE,TRUE,'',TempExcelBuffer."Cell Type"::Text);
  EnterCell(RowNo,11,FIELDCAPTION("Sales (LCY)"),FALSE,FALSE,TRUE,'',TempExcelBuffer."Cell Type"::Text);
END;
That is all for this post, if you download the files which are for Dynamics NAV 2013 R2 there is a text version and fob where the code can be explored in a test database, in Part Three I will add formatting and some real cell formulas in code.
The Sample Report and Table are for Version 2013 R2, the new code and functions are meant to explore a way of adding Multiple Worksheets to an Excel Workbook from Dynamics NAV 2013 R2, they are not meant to go straight into a production environment and should be added and tested in a Cronus test environment.
Please feel free to leave a comment below, any feedback is welcomed and might help others that are looking at this solution, the download contains both fob and text files.